Code
library(tidyverse)Blogging is great for many reasons. And with Quarto, blogging has never been easier. Within a few clicks, you can create your own Quarto blog. And the best part is: With Quarto you can customize basically everything according to your wishes.
Today, I want to show you how to build a blog with Quarto. This in-depth guide is the result of hours of working with Quarto’s amazingly detailed documentation. Hopefully, it will save you a lot of time and helps you start your own blog. Here’s what we will cover:
{renv}Notice that this is a lot. I don’t want to brag. But this is a lot. Do yourself a favor and skip the time-intensive steps if you’re just starting out with your blog.
In the beginning, the most important thing is to write regularly. This is WAAAAY more important than, say, using many fancy colors in your blog. At first, you can just go with a pre-defined theme and a standard landing page.
Really, I cannot stress this enough: If you want to start a blog, start writing regularly first. Worry about your design later. The only way I could stress this more would be to say it in Spanish.
And if you’re not sure what steps you can skip from my detailed guide, Beatriz Milz got you covered. In one of her blog posts she shows you how to get started with your Quarto blog in 10 steps. So, you can always start with her intro to get started quickly and then successively add parts from my guide.
Alright, enough chit-chat. Let’s dive in.
In case it is not self-evident of why you should start a blog, let me give you a few good reasons.
Learning: Writing acts as a safeguard from shallow understanding. I cannot count how many time I erroneously thought I’ve understood something. But working on a blog post often showed me that my first “understanding” was wrong. That’s why writing is such an effective tool for learning.
Helping others: When you share your learnings, you will eventually help people who are struggling with similar problems. Don’t worry if you’re not an expert. Usually, people don’t enjoy learning from experts.
Rather. people like to learn from other learners who are just a few steps ahead. That’s because experts tend to leave out details that are “obvious”. Yet, some things are only obvious once you are an expert.
Portfolio and job opportunities: If you publish content on the internet, you can always show people what you’ve created. This is great for demonstrating your skills (e.g. when applying for a job). Also, from personal experience I can tell you: Writing in the open can lead to job opportunities. You never know who ends up reading your blog and wants to work with you.
Once you have installed Quarto, it is dead-simple to start a blog. If you don’t use RStudio, you’ll have to call
quarto create-project myblog --type website:blogfrom the command line. In RStudio, you’ll have to click on the “new project”-button and the menu will let you create a new Quarto blog.
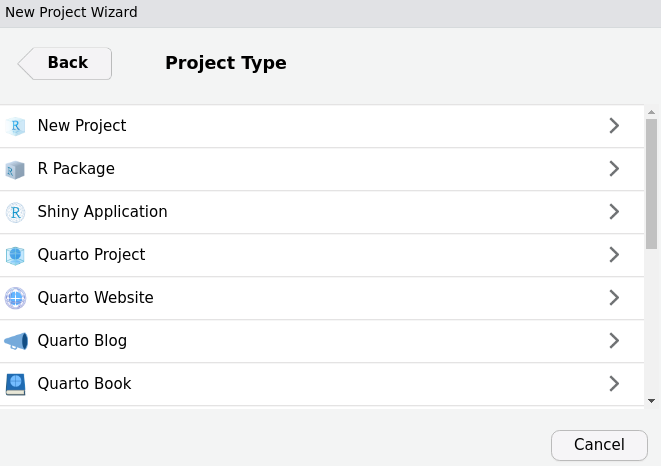
You should also create a git repo for your blog project (RStudio will ask you if you want that). This lets you revert changes when you break your blog. And after answering all of RStudio’s prompts, you can render your blog with Render Website from RStudio’s Build tab.
First, let us make the about page into a landing page. Use it to introduce your blog to your readers instead of flooding them with a list of blog posts. To do so, rename two files:
index.qmd to blog.qmdabout.qmd to index.qmd
The next easy changes happen in the _quarto.yml file. There, we will mostly change some general info about our blog and stuff in the navbar. Most of the steps are self-explanatory that’s why I only list the steps I think are necessary.
website > titlesite-url for your blog (this is important for RSS feeds later. If you don’t have a URL yet, you can skip this step for now).about.qmd and link to blog.qmdtheme: theme.scss. This will be used for custom styling later. But you can also set theme to one of Quarto’s pre-defined themes.You can also take a look at my _quarto.yml file:
_quarto.yml
project:
  type: website

website:
  title: "Albert Rapp"
  site-url: https://albert-rapp.de
  description: "This is Albert Rapp's personal Blog."
  navbar:
    right:
      - text: Blog
        href: blog.qmd
      - icon: github
        href: https://github.com/AlbertRapp
      - icon: twitter
        href: https://twitter.com/rappa753
      - icon: youtube
        href: https://www.youtube.com/user/Alfrodo123
#########################
# You can ignore this part in the first step
      - icon: rss
        href: blog.xml
      - text: Ressources
        menu:
          - text: DataViz Portfolio
            href: dataviz_portfolio.html
          - text: YARDS
            href: https://yards.albert-rapp.de/
          - text: R Weekly
            href: https://rweekly.org/
          - text: R Bloggers
            href: https://www.r-bloggers.com/
      - text: Archive
        href: archive.qmd
  google-analytics: <Insert your ID here>
  cookie-consent: true
  twitter-card:
    image: thumbnail_blog.png
    card-style: summary_large_image
    creator: "@rappa753"

filters:
  - code-filename
#########################

format:
  html:
theme: theme.scssYou can create a new blog post by creating a new .qmd-file in the posts directory. But I recommend that you create a new sub-directory in posts for each new blog post. So, starting a new blog post is just a matter of
posts/new_blog_post..qmd-file in this new directory, e.g posts/new_blog_post/post.qmd.If you’ve followed these steps, you can render your new blog post by clicking Render Website in RStudio’s Build tab. This will render all .qmd-files that have not been rendered before. If you want to make changes to a blog post, then you will have to render the respective .qmd-file manually.
In general, it’s good that you don’t have to re-render everything when you write a new post. The posts/_metadata.yml file ensures that. Its main purpose is to set global options for all you blog posts in the posts directory.
By default, this file sets freeze: true. That’s the reason why you have re-render blog posts manually. In _metadata.yml, we can define more YAML options for all blog posts. Most of the changes I applied in this file are self-explanatory. Thus, I leave you with my _metadata.yml file.
posts/_metadata.yml
# Options specified here will apply to all posts in this folder

# freeze computational output
freeze: true

# Enable banner style title blocks
title-block-banner: false

# Author name of all blog posts
author: 'Albert Rapp'

# Table of content settings
toc: true
toc-depth: 3

page-layout: article

#########################
# You can skip this part in the first step
format:
  html:
    include-after-body: ../footer.html

comments:
  utterances:
    repo:  AlbertRapp/blogComments
#########################Creating a series (like my ggplot2 series) is great because it bundles similar content into one thread. However, we need to understand listing pages before we can create our own series.
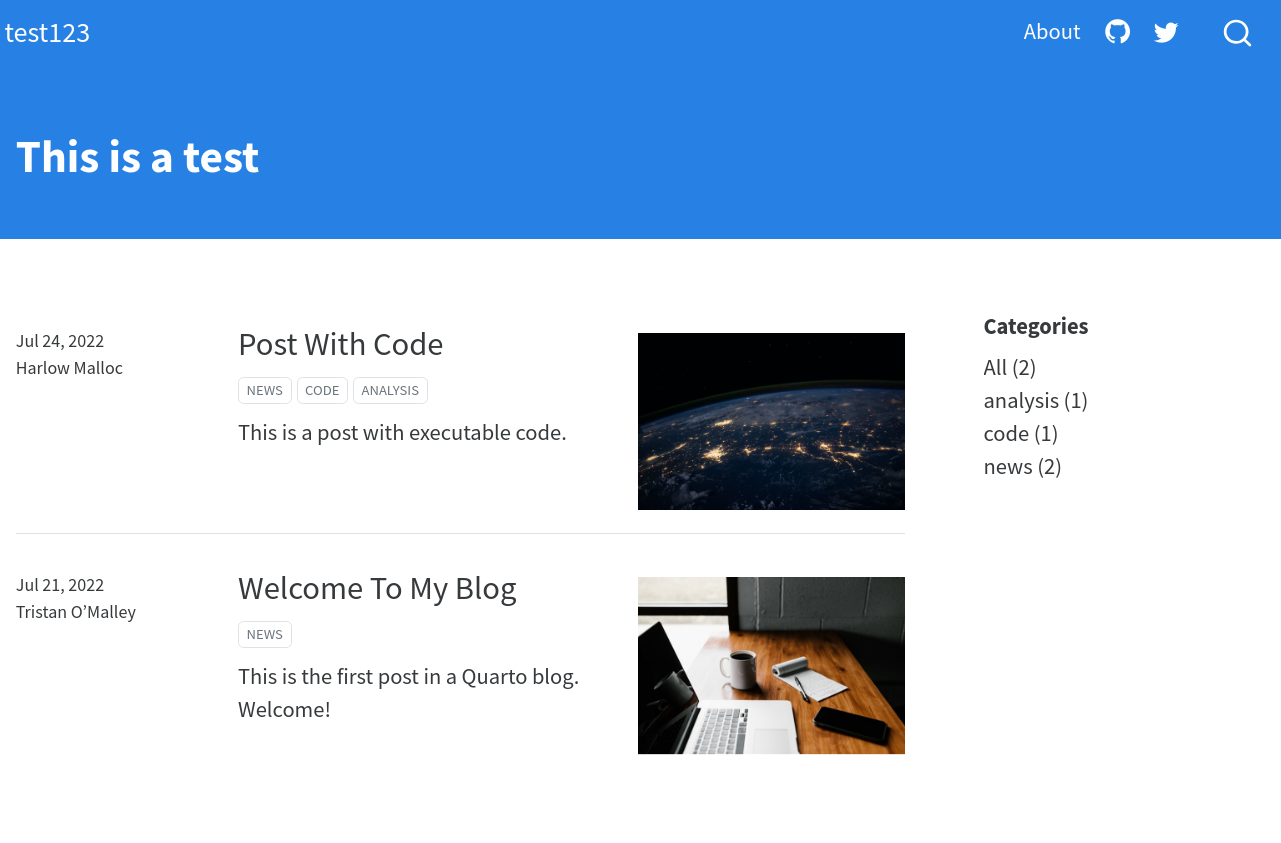
The file blog.qmd is a listing page. It determines what blog posts will be listed on our Blog page. The important stuff happens in this file’s YAML header. Here’s how my header looks.
blog.qmd
---
listing:
  contents: posts/**/*.qmd
  sort: "date desc"
  type: default
  categories: true
  sort-ui: true
  filter-ui: true
  fields: [date, title, reading-time, description, categories]
  feed: true
page-layout: full
title-block-banner: false
---
Let me briefly describe a few of these options:
contents: posts/**/*.qmd means that all .qmd-files from the posts directory (and sub-directories) will be included in this listing page. If your posts directory will only contain .qmd-files, then you may as well just write contents: posts. In my case, though, some directories contain .md-files that I don’t want to list.
If you wish, enable sorting & filtering via sort-ui: true and filter-ui: true. The default sorting is set via sort.
I don’t like the title block banner. So I set the corresponding option to false.
More importantly, I want to display a post’s reading time instead of the author (I am the only author anyway). By changing the fields options, I can make that happen. In the Quarto’s docs you can find more options for fields.
feed: true instructs this listing page to generate an RSS-feed. This works only if we have set the site-url in our _quarto.yml file. If we have enabled RSS feeds, then this listing page will generate a feed that will be saved in the file blog.xml (because the generating file is blog.qmd). That’s why I have linked the RSS icon in our _quarto.yml file to blog.xml.
Now that we understand listing pages we can create more of them. For example, let us create an archive. This is nothing but a listing page that lists all blog posts without a description.
For this archive I have created a new file archive.qmd in my blog’s main directory and filled it as follows. Notice that page-layout: full. This means that there is no additional side margin for the category labels.
archive.qmd
---
title: "Archive"
page-layout: full
listing:
  contents: posts/**/*.qmd
  type: default
  fields: [date, title]
  sort: 'date desc'
---Finally, we can create new listing pages for blog posts that belong to a series. For this to work, all posts that belong to a series must reside in a single new sub-directory of posts. For my blog, I have created a sub-directory posts/ggplot2-tips. And the corresponding listing page is generated by ggplot-series.qmd.
ggplot-series.qmd
---
title: "Series: ggplot2-tips"
listing:
  contents: posts/ggplot2-tips
  sort: "date desc"
  type: default
  categories: false
  sort-ui: false
  filter-ui: false
  fields: [date, title, reading-time, description]
page-layout: full
title-block-banner: true
---
Now, we have to link to our new listing pages somewhere. I chose to link to my archive in the navbar (see _quarto.yml). And my ggplot2 series found a home above the list of all other blog posts. I made this happen by modifying blog.qmd with regular Markdown magic. This could look as follows:
blog.qmd
---
listing:
contents: posts/**/*.qmd
sort: "date desc"
type: default
categories: true
sort-ui: true
filter-ui: true
fields: [date, title, reading-time, description, categories]
feed: true
page-layout: full
title-block-banner: false
---
# Series
##### [ggplot2-series](ggplot-series.html)
This series contains a great deal of tips, tricks and packages
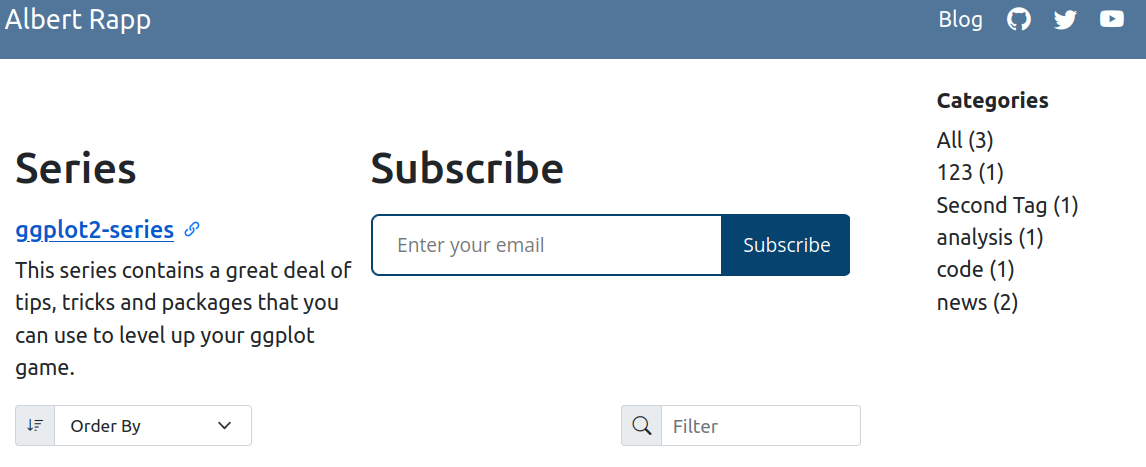
that you can use to level up your ggplot game.In reality, my blog listings page looks a little bit different because I use two columns (as you can see for yourself) but we’ll come to that shortly.
Did you really publish a blog post if no one reads it? Let’s face it. The best content in the world won’t save you from going unnoticed if readers cannot keep in touch. Luckily, we have already taken the first steps to let your audience connect to you.
For starters, your newly created RSS-feed can notify readers whenever you post something new. Also, you can submit your newly created RSS-feed to feed-aggregators like Rweekly or Rbloggers. This will increase your reach in an automated fashion. More importantly, Rweekly and Rbloggers are great places to show your content to the R community.
Another popular way to engage with your readers is via newsletters. The idea is simple:
Thankfully, you don’t have to send the mails manually. There are many free providers that can help with the logistics. And most of these services provide HTML snippets for registration too. That’s fantastic because you can place this snippet anywhere you like. In my case, Beehiiv provided the following snippet.
<iframe id="beehiiv-form" src="https://embeds.beehiiv.com/9232d2a2-6e85-4beb-b8ed-1de94e9e4f01?slim=true" data-test-id="beehiiv-embed" frameborder="0" scrolling="no" style="margin: 0; border-radius: 0px !important; background-color: transparent; height: 75px; width: 90%;"></iframe>Let’s put it somewhere easy first. Let us use Quarto’s column syntax for this. In case you don’t know it, here’s a demo.
:::: {.columns}


::: {.column width="50%"}
### Column 1
This is written in column 1
:::

::: {.column width="50%"}
### Column 2
This is written in column 2
:::

:::: This is written in column 1
This is written in column 2
Now we can use this to put our registration snippet at the top of the blog listings page. For example, we could modify blog.qmd as follows.
blog.qmd
---
listing:
  contents: posts/**/*.qmd
  sort: "date desc"
  type: default
  categories: true
  sort-ui: true
  filter-ui: true
  fields: [date, title, reading-time, description, categories]
  feed: true
page-layout: full
title-block-banner: false
---

:::: {.columns}

::: {.column width="40%"}
# Series

##### [ggplot2-series](ggplot-series.html)
This series contains a great deal of tips, tricks and packages
that you can use to level up your ggplot game.
:::

::: {.column width="60%"}
# Subscribe
<iframe id="beehiiv-form" src="https://embeds.beehiiv.com/9232d2a2-6e85-4beb-b8ed-1de94e9e4f01?slim=true" data-test-id="beehiiv-embed" frameborder="0" scrolling="no" style="margin: 0; border-radius: 0px !important; background-color: transparent; height: 75px; width: 90%;"></iframe>
:::

:::: 
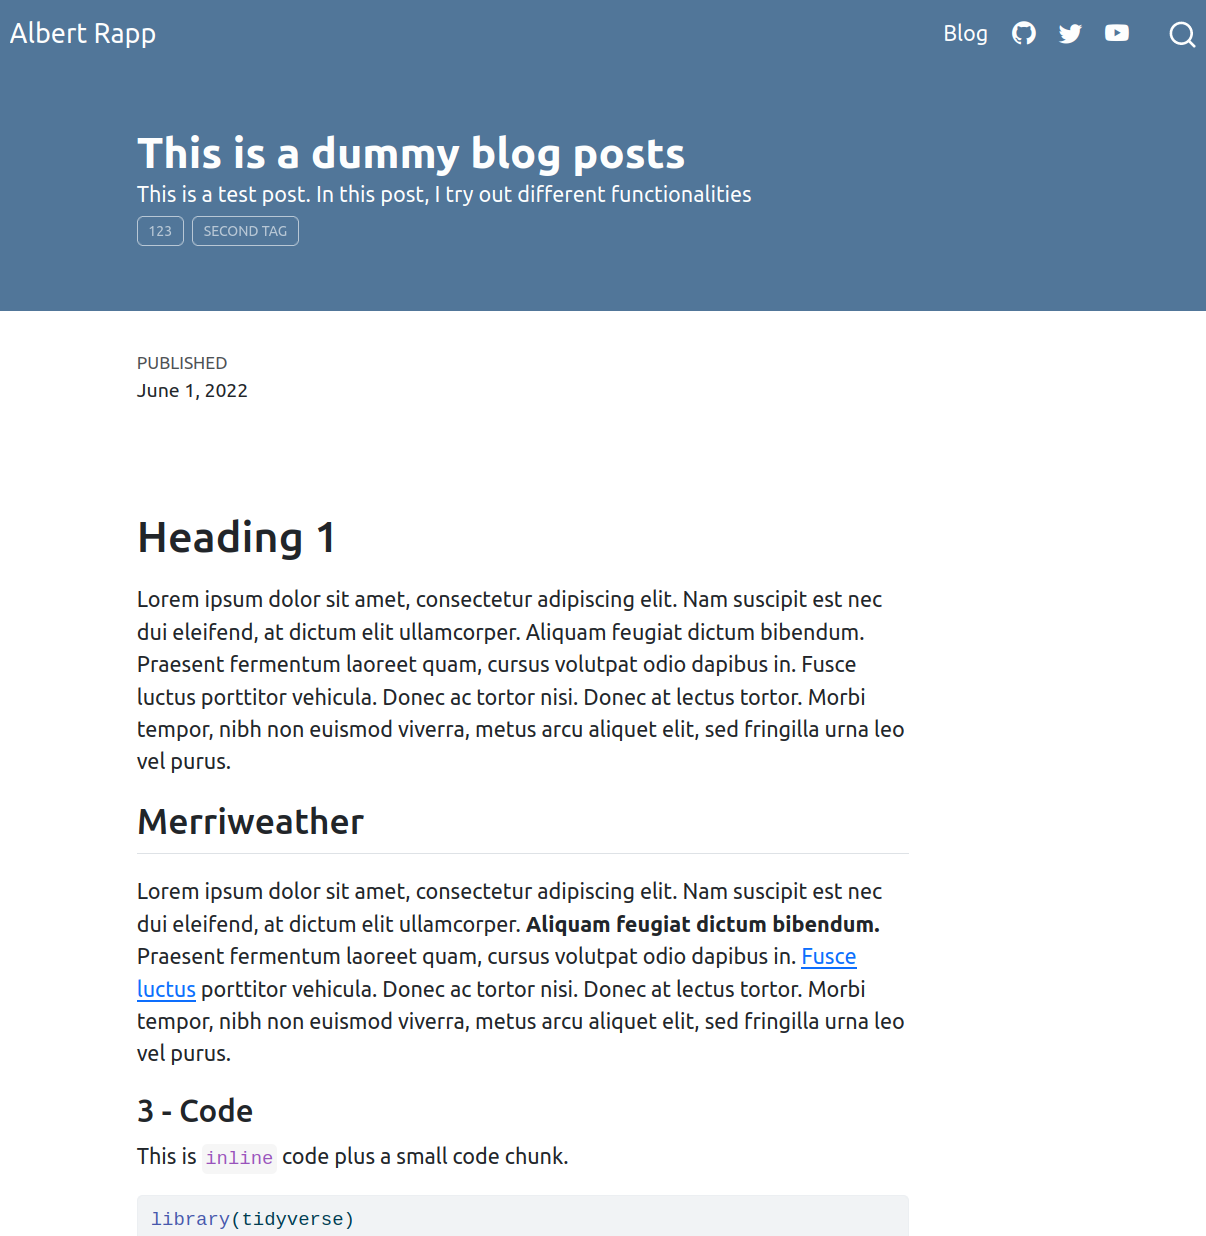
Now, we’re going to do something harder. We will include something at the end of every blog post (before the comments). That’s the perfect spot for
Newsletter registrations,
“Share on”-buttons,
“Buy me coffee”-buttons or
whatever else you fancy.
For example, this could look like my current footer.
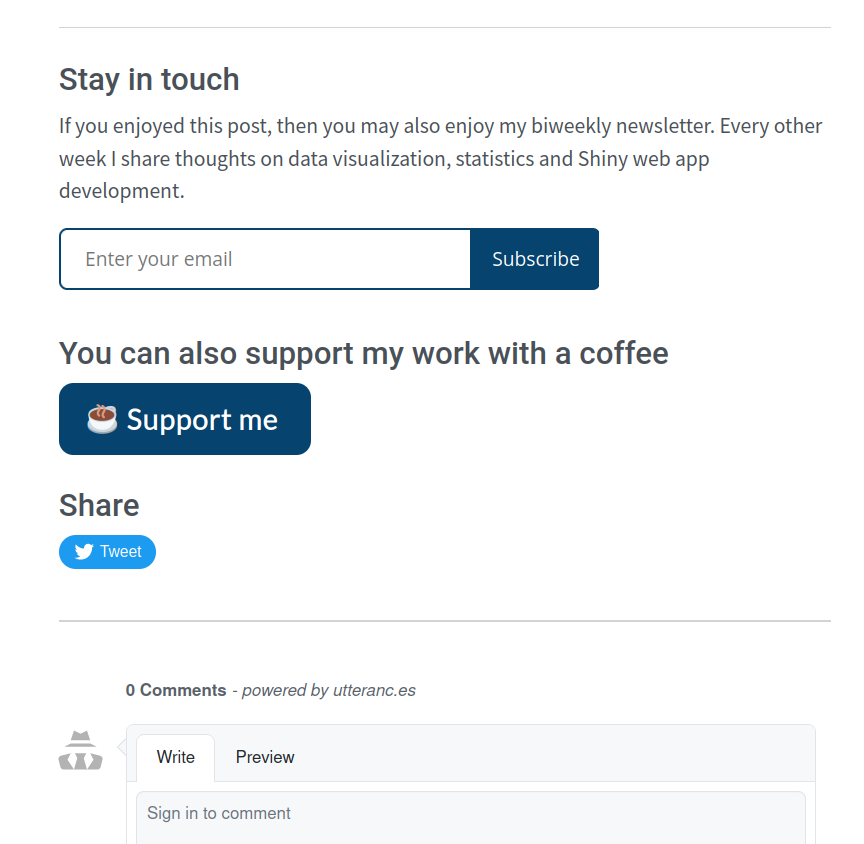
To include something at the end of posts, I’ve found format > html > include-after-body helpful. That’s the part you have seen earlier in my _metadata.yml file. You don’t know which part I’m talking about? Well, it’s easy to forget. But don’t worry. I got you. Here’s the part I mean.
posts/_metadata.yml
format:
  html:
    include-after-body: ../footer.html
Of course, this assumes that you have whipped together a footer.html file in the main directory. If you don’t know HTML, then you can always use code from a .qmd-file’s output (more on finding HTML-code later). For my blog, I have created the following simple HTML-file.
footer.html
<div>
<hr>

<h3> Stay in touch </h3>

<p> If you enjoyed this post, then don't miss out on any future posts by subscribing to my email newsletter. </p>

<iframe id="beehiiv-form" src="https://embeds.beehiiv.com/9232d2a2-6e85-4beb-b8ed-1de94e9e4f01?slim=true" data-test-id="beehiiv-embed" frameborder="0" scrolling="no" style="margin: 0; border-radius: 0px !important; background-color: transparent; height: 55px;"></iframe>


<h3> Support my work with a coffee </h3>

<script type="text/javascript" src="https://cdnjs.buymeacoffee.com/1.0.0/button.prod.min.js" data-name="bmc-button" data-slug="rappa753" data-color="#06436e" data-emoji="☕"  data-font="Lato" data-text="Support me" data-outline-color="#ffffff" data-font-color="#ffffff" data-coffee-color="#FFDD00" data-height="40px" ></script>

<h3> Share </h3>

<a href="https://twitter.com/share?ref_src=twsrc%5Etfw" class="twitter-share-button" data-size="large" data-hashtags="#rstats" data-show-count="false">Tweet</a><script async src="https://platform.twitter.com/widgets.js" charset="utf-8"></script>

<hr>
</div>
Note that the code for all the widgets were provided from the respective service. I certainly didn’t code that stuff myself. You know, I’m not an HTML expert.
At some point, you will likely want to customize your blog’s visual appearance. This will include changing colors, fonts and sizes of all sorts of things.
And same as the internet, Quarto runs on HTML and CSS. These two languages are the major players that style your blog. Luckily, you don’t have to know a lot about them to style your blog.
That’s because Quarto already generates a whole lot of HTML and CSS code when you render your blog. Consequently, it takes only a little peaking behind the HTML/CSS curtain to find out what values need tweaking.
I know, this sounds quite complicated. But it isn’t. I don’t know a whole lot about HTML and CSS but I have customized this blog, haven’t I? In fact, working on this blog has been a fun way to learn more about these two languages. To help you do the same, I have created a video that walks you through the process of
You can find the video on YouTube.
Update (July 2023): I have created two new videos that are not targeted at styling blogs specifically but Quarto documents in general. Still, you may find these videos more helpful than the previous one. The first one covers the easiest way to style Quarto docs with so-called Bootstrap variables.
And the second video shows you how to go beyond Bootstrap variables and style anything you like.
If videos are not your thing, here’s the high-level summary:
In quarto.yml, we have set theme: theme.scss. Thus, all visual elements of this blog are governed by this SCSS-file. But it doesn’t exist yet. That’s why everything is set to default values. So, create theme.scss yourself by creating an empty text file and renaming it to theme.scss.
Quarto uses a framework called Bootstrap. In this framework, you can change most parts of your blog by changing a variable’s value. For instance, there is a variable called $primary (variables use dollar signs in SCSS). It governs the main color of your blog. And you can change it to any color you like.
Similarly, your text color is governed by $body-color and your text font is determined by $font-family-base. Quarto lists the most common variables in their docs. For the full list of variables you can check out Bootstrap’s Github page. Here are the variables I have set at the beginning of my theme.scss file.
theme.scss
/*-- scss:defaults --*/
$primary:  #06436e !default;
$font-family-base:  'Source Sans Pro',  'Lato', 'Merriweather', 'Roboto Regular', 'Cabin Regular' !default;
$body-color: $gray-700 !default;
$headings-font-family:  'Prata', 'Roboto', 'Playfair Display', 'Montserrat'    !default;
Notice that my file starts with /*-- scss:defaults --*/. This is just something an SCSS-file expects. Also, make sure to use multiple fonts. As not every computer has every font installed, it’s good to offer multiple alternatives for your reader’s computer.
Consequently, when you want to style your blog, you can stroll through the list of variables. Once you have found a variable that you want to change (most variable names are quite self-explanatory), just throw that into your scss-file.
Unfortunately, not everything can be changed with Bootstrap variables. In this case, you will need to take a look at your blog’s source code. To do so, open your blog in a browser of your choice. Then, right-click anywhere and press “Inspect”. This will open the developer mode of your browser.
Now, you can see your blog’s source code. This view can be quite daunting. But don’t worry. You can ignore most of it. The only thing you need is the most specific description of the part you want to tweak.
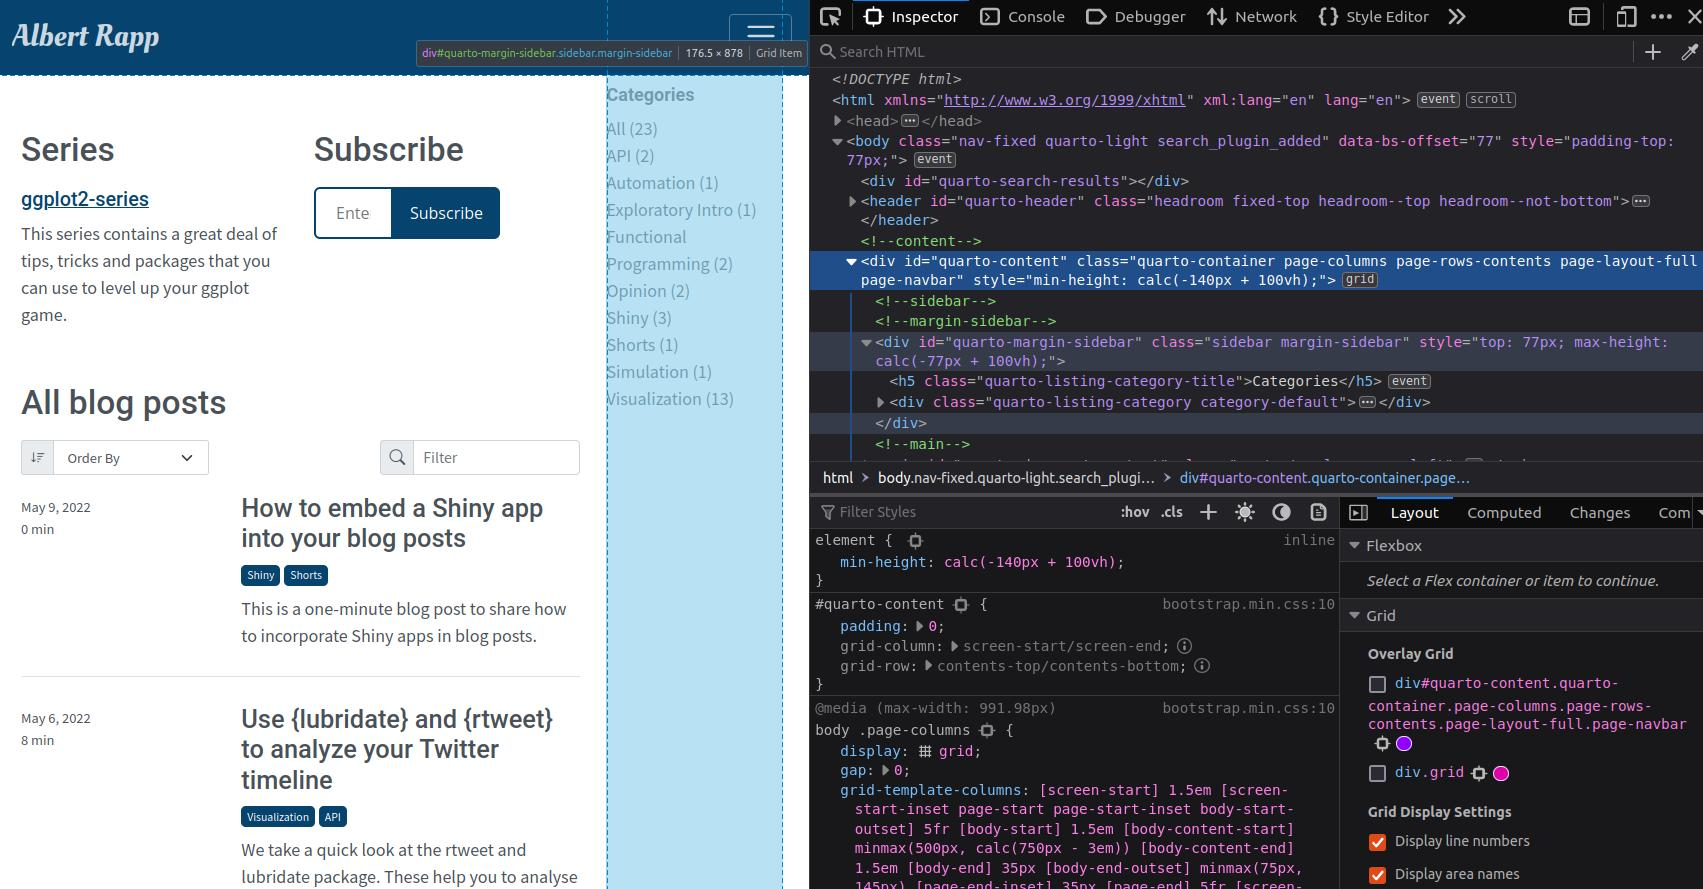
You see, in HTML and CSS everything consists of (nested) tags, classes and IDs. All of these are indicated by a different symbol:
<...> stands for tag, e.g. <div> </div> (This is a section)
. stands for class, e.g. .grid (This is grid class object)
# stands for ID, e.g. #my_about_page (This is a name that you can access in your CSS code)
As you move your cursor through the HTML code, your browser will show you what element in your blog corresponds to the code you’re currently hovering over. This helps you to find the HTML code responsible for the part that you want to tweak. Once you have found the desired code section, the CSS-code will also show you a mix of tags, classes and IDs that describe this element.
For example, each blog title is described by
#title-block-header.quarto-title-block.default .quarto-title .titleJust copy this from your browser’s developer page and put it into your SCSS-file. Then, add {} and describe how you want to style the element. This could look like so.
theme.scss
/*-- scss:rules --*/
#title-block-header.quarto-title-block.default .quarto-title .title {
  font-family: "Oleo Script", "Libre Baskerville", $headings-font-family;
  font-size: $font-size-base * 2.5;
}
Here I have chosen to use different fonts for blog titles (if possible) and make the font larger. I tried to avoid hard-coding the font size with something like 14pt. Instead, I have taken the Bootstrap variable $font-size-base and scaled it. Finally, notice that SCSS-rules - like the one we have just defined - need to be written after /*-- scss:rules --*/ in your SCSS-file.
So, now you have learned a way to style your blog. You can basically change everything you like this way. And you don’t need to know much about HTML/CSS for that. You just need some patience strolling through the code.
Of course, you will need to know the keywords like font-family, font-size, etc. But you will stumble across the most common keywords in the HTML code anyway. Alternatively, a quick web search can help. And if you want, you can take a look at my theme.scss file.
This file also includes a few @media (min-width: ...px) calls that styles the blog differently on small screens (depending on the amount of pixels). You can ignore this part for now.
Are you a fan of dark modes? Me too! Though, at the time of writing I haven’t gotten around to add a dark mode to this blog. But the steps to include a dark mode are easy. You just have to modify your _quarto.yml file as follows.
_quarto.yml
format:
  html:
    theme:
      light: theme.scss
      dark: theme-dark.scss
This will add a dark mode toggle to your navbar. And now you can style the dark mode in the same way as before by creating a new scss-file for it.
My own landing page is custom built and here I’ll show you how you can do the same. But there is absolutely no reason against using one of the built-in templates (especially if you’re just starting your blogging career).
Building my landing page will require a little bit more knowledge about HTML and CSS. Don’t be alarmed, though. You can easily follow along if you’ve understood how to work with classes and IDs (as described earlier or in my video).
First, we need to set up index.qmd. This file determines what your blog’s landing page looks like. Delete all content from this file and replace it with
index.qmd
---
page-layout: full
---
Second, set up a grid system. Quarto uses the CSS-grid system. We can make use of that in index.qmd via
index.qmd
::: {.grid}
CONTENT
:::
Recall that the dot (.) in CSS stands for class. So, the previous code means quarto will render your qmd-file into an html-file that contains a section (a div in HTML-speak) that is of class grid. We will fill this div with columns next.
Adding columns is done by adding more divs. In this case, these divs are of the class g-col-*. Here, * describes how many columns the div should fill (out of 12 columns). The actual content is written with regular Markdown. This could look like so:
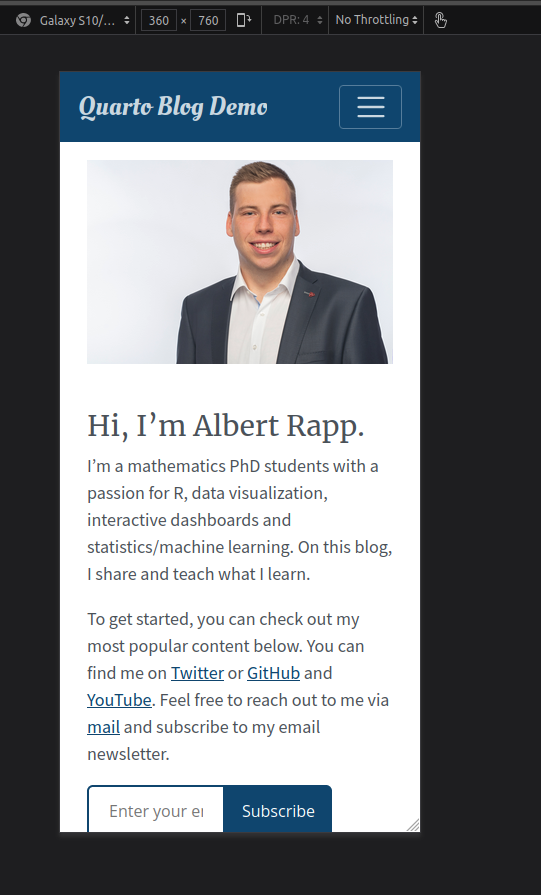
index.qmd
::: {.grid}
::: {.g-col-6}

:::
::: {.g-col-6}
# Hi, I'm Albert Rapp.
I'm a mathematics PhD students with a passion for R, data visualization, Shiny and statistics/machine learning. On this blog, I share and teach what I learn.
To get started, you can check out my most popular content below. You can find me on [Twitter](https://twitter.com/rappa753) or
[GitHub](https://github.com/AlbertRapp) and
[YouTube](https://www.youtube.com/user/Alfrodo123).
Feel free to reach out to me via [mail](mailto:blog@albert-rapp.de) and subscribe to my email newsletter.
<iframe id="beehiiv-form" src="https://embeds.beehiiv.com/9232d2a2-6e85-4beb-b8ed-1de94e9e4f01?slim=true" data-test-id="beehiiv-embed" frameborder="0" scrolling="no" style="margin: 0; border-radius: 0px !important; background-color: transparent; height: 75px"></iframe>
:::This code will create the following landing page.
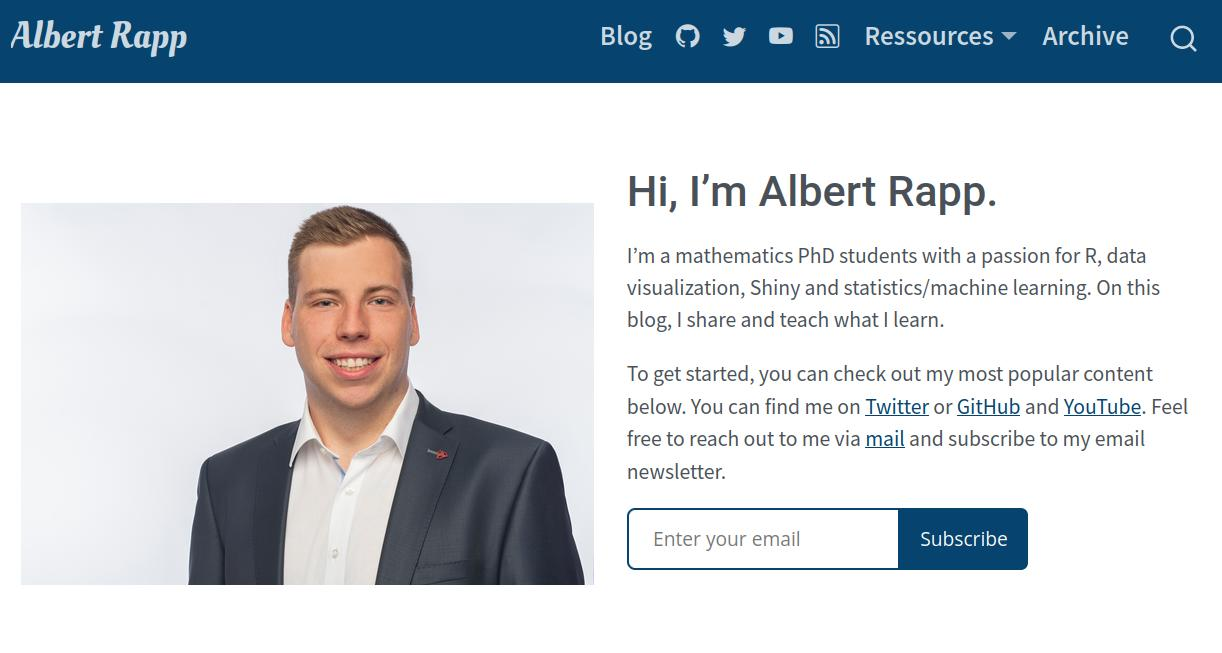
Our new landing page will look decent on large screens. But we should test what it looks like on small screens too.
However, there’s no need to take out your phone. Use your browser and activate its responsive mode (ctrl+shift+M in Firefox). This way, you can see what your website would look like on phones or tablets.
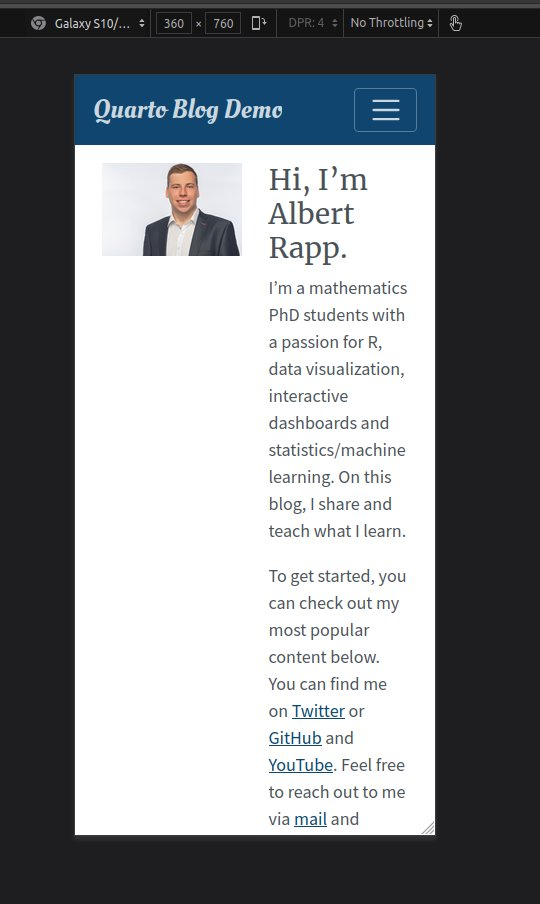
If you’ve checked the view on phones, then you may notice that splitting the screen in two won’t fly. In this case, it’s better to put sections below each other. We can make that happen by adding g-col-md-* classes to our previous divs (and making the other classes full-width).
index.qmd
::: {.grid}
::: {.g-col-12 .g-col-md-6}

:::
::: {.g-col-12 .g-col-md-6}
# Hi, I'm Albert Rapp.
I'm a mathematics PhD students with a passion for R, data visualization, Shiny and statistics/machine learning. On this blog, I share and teach what I learn.
To get started, you can check out my most popular content below. You can find me on [Twitter](https://twitter.com/rappa753) or
[GitHub](https://github.com/AlbertRapp) and
[YouTube](https://www.youtube.com/user/Alfrodo123).
Feel free to reach out to me via [mail](mailto:blog@albert-rapp.de) and subscribe to my email newsletter.
<iframe id="beehiiv-form" src="https://embeds.beehiiv.com/9232d2a2-6e85-4beb-b8ed-1de94e9e4f01?slim=true" data-test-id="beehiiv-embed" frameborder="0" scrolling="no" style="margin: 0; border-radius: 0px !important; background-color: transparent; height: 75px"></iframe>
:::Here, .g-col-12 .g-col-md-6 means that the div will use 12 columns (full width) by default. But on screens of at least medium width (>=768px), the div will only take 6 columns. Congrats, you’ve now used responsive design. 🥳
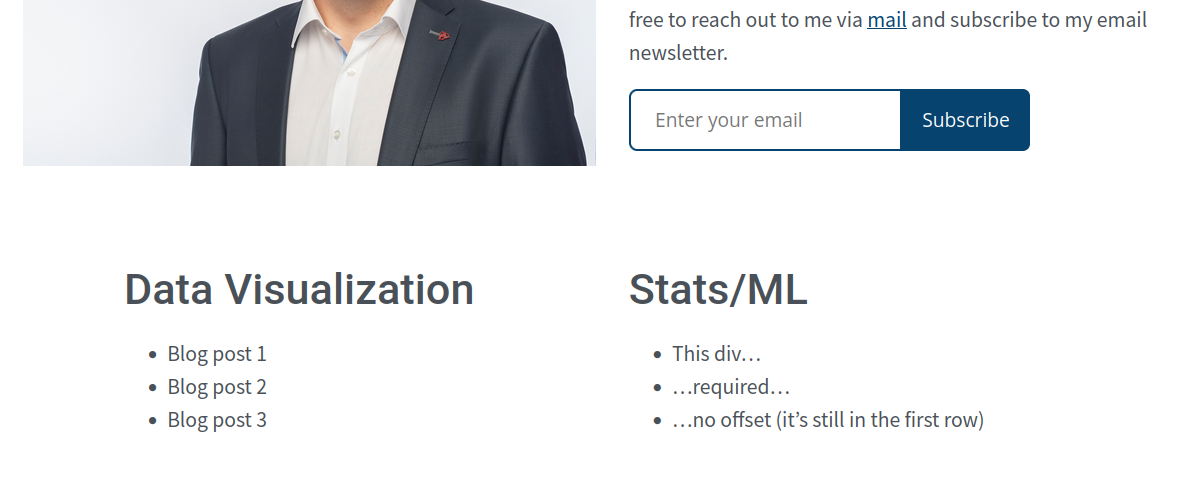
Next, we should use our landing page to highlight our best content. Think of this as a getting started guide for your readers. Here, I want to use centered columns of width 5. And to ensure that the columns are centered let us offset the first block by one column (on larger than medium screens).
This is accomplished by adding yet another class to the div, namely g-start-md-*. Here, *️ is the start column. And seeing this in action may look like this:
index.qmd
::: {.g-col-12 .g-col-md-5 .g-start-md-2}
# Data Visualization

- Blog post 1
- Blog post 2
- Blog post 3
:::

::: {.g-col-12 .g-col-md-5}
# Stats/ML

- This div...
- ...required...
- ...no offset (it's still in the first row)

:::
Finally, you can always customize the appearance of a grid element by adding more custom classes (with .) or IDs (with #). Afterwards, you can target that class or ID in your SCSS file. This way, I aligned my bio with the bottom of the picture.
index.qmd
::: {.g-col-12 .g-col-md-6 #about-me-text}

:::theme.scss
#about-me-text {
  align-items: end;
  display: grid;
}Imagine that you have written a really cool blog post. And not just any cool blog post. I mean a SUPER DUPER cool blog post. Did you imagine that? Good. That’s your future when you start a blog. But don’t get too excited yet! Here’s the drama of this fairy tale.
Unfortunately, your super cool blog post uses version 1.2.4. of {ggplot2}. This is unfortunate because right now we’re at version 3.3.6. And a lot has changed since your blog post was rendered last time.
What’s worse is that you won’t be able to render your blog anymore if you ever need to re-render all blog posts. This can happen, for example, if you move your blog to a different format, e.g. Quarto.1
Luckily, it’s possible to tell R which package versions it should use for your blog posts. To do so, you need to control the versions with {renv}. This is a package like any other package and you can install it with install.packages('renv').
Once you have installed {renv}, you can use it within your blog project. Actually, it is quite simple to set up. Here’s how {renv}’s docs describe the workflow.
Call
renv::init()to initialize a new project-local environment with a private R library,Work in the project as normal, installing and removing new R packages as they are needed in the project,
Call
renv::snapshot()to save the state of the project library to the lockfile (calledrenv.lock),Continue working on your project, installing and updating R packages as needed.
Call
renv::snapshot()again to save the state of your project library if your attempts to update R packages were successful, or callrenv::restore()to revert to the previous state as encoded in the lockfile if your attempts to update packages introduced some new problems.
So, if you’ve just started your blog project, then renv:init() will set you up with a clean slate. This means that whenever you want to use a package that you have not used before in this project, you will need to install the package for this project (via install.packages()). Yes, this is true even if you have used, say, {ggplot2} in other projects.
In case you’re running into installation problems with {renv}, you’ll need to change your download method for new packages. Simply add the following line to your .Renviron file. Either find this file on your computer manually or open it by calling usethis::edit_r_environ() (if necessary from a not {renv}-controlled project).
Sys.setenv(RENV_DOWNLOAD_FILE_METHOD = getOption("download.file.method"))Whenever you have installed or updated packages in this project, then call renv::snapshot(). This will save all package information including version numbers into a so-called lock file renv.lock (which will appear in your projects main directory). Now, here’s what you need to do to make each of your blog posts robust against version changes.
After finishing anew blog post, call renv::snapshot(). This will update your renv.lock file of your blog project.
Take this updated renv.lock file and copy it into the directory of your newly finished blog post.
In your new blog post, add the following code chunk at the top of your blog post’s qmd-file (after the YAML header, of course).
#| echo: false
#| results: 'hide'
renv::use(lockfile = "renv.lock")
That’s it. You have successfully saved your blog post from dying by version change. Whenever your blog post needs to be re-rendered, this first code chunk will instruct R to use the package versions that are defined in this post’s lock-file.
But let me warn you that this is not a perfect solution. Your blog posts are still not invincible. For example, {renv} does not prevent problems when you have written your blog post on a Windows system and want to re-render it on Ubuntu. Possibly, some packages (e.g. {keyring}) behave differently on a different OS.
There are many, many more cool features that Quarto has in store for your blog. Let me briefly mention a few more gems.
Analytics: You’re probably curious about how much attention your blog attracts. To find out, you can measure your website’s traffic with Google analytics. Simply register with Google and you will get a tracking ID. This ID can be added in your _quarto.yml file via google-analytics. For more information, check out the Quarto docs.
Cookie consent: It is rude and more importantly illegal to track your readers with cookies without their consent. So it is paramount that you ask your readers for permission if you use cookies. This can be done via a simple, yet ABSOLUTELY ANNOYING, pop-up window that asks for consent. Activate this window via cookie-consent: true in _quarto.yml.
Social card: A great place to share your blog posts is Twitter. But to get the most out of your promo tweets, your links should probably generate a Twitter card. Once again, you can enable this feature in your _quarto.yml file. And for custom styling of your Twitter card, please refer to the Quarto docs. Note that it takes some time (days) until Twitter registers your changed Twitter card information.
Extensions: Quarto’s functionality can be leveled up with Extensions. For example, the code-filename extension helped me to include a file name at the top of many of this post’s code chunks. If you want to use the code-filename extensions as well, then proceed as follows. Of course, this works with any other extension as well. (Update: The code-filename extension was now integrated into Quarto. So it’s not necessary to install it. But the idea for installing extensions remained the same.)
Make sure that your Quarto version is up-to-date. Extensions are a fairly new feature.
Install code-filename locally for your blog project: You will need to open a terminal at your blog’s working directory and execute
quarto install extension quarto-ext/code-filenameNotice that there is a new directory _extensions in your blog’s directory now. (This is not really a step that you have to do but still it’s nice to notice changes).
Add the new extension to your _quarto.yml file to activate it.
_quarto.yml
filters:
  - code-filename
Enjoy your new feature. You can use it like
``` {.yaml filename=_quarto.yml}
filters:
    - code-filename
```
PDF Output: On Twitter, I was asked if my guide can include some info on Quarto’s PDF output options. In this context, this reminds me that a reader once emailed me and asked whether I can provide a PDF-file for one of my blog posts. So, I guess, some people may be interested in having PDF- as well as HTML-versions of your blog.
In principle, you could add an additional format to, say, your _metadata.yml file. In my case, this could look like
posts/_metadata.yml
format:
  html:
    include-after-body: ../footer.html
pdf:
  toc: true
Unfortunately, I haven’t found a button or shortcut to render both outputs simultaneously in RStudio. But with the command line (which you can use in RStudio), it is simple. You’ll just have to call
quarto render --to allThis will render all of your blog posts to both HTML and PDF. Now what’s cool is that a reader can easily access the PDF version by changing a post’s link e.g. from site-url/post_XY.html to site-url/post_XY.pdf.
Of course, all of that will only work if your blog posts contain static elements that work in a PDF. Possibly, this can be cirumvented and Quarto’s docs on book formats (it’s a more pressing issue for books) may have some info on that. Personally, I avoid PDFs in my blog.
Adding ressources: Sometimes you want to add a few static materials to your blog post. For example, I’ve included multiple app.R files in a blog post about Shiny. In order to link to these, they need to be included as a Ressource to the blog post.
In this case, all files were located in a sub-directory called DummyApp. Thus, I could include all files in the YAML header via
format:
  html:
    resources:
      - DummyApp
Then, I can link to the files via their path. The same trick works, when you want to include an audio file to your blog post. Make sure that the audio file, say audio.mp3, is in your post’s directory and then add some html magic like so:
<figure>
<figcaption>Click to listen</figcaption>
<audio controls src="audio.mp3">
        Your browser does not support the
        <code>audio</code> element.
</audio>
</figure>format:
html:
resources:
- audio.mp3Links from your old blog: If you already had a blog, then you may wish that your old hyperlinks continue to work. For example, I have linked to my blog post about rounded rectangles in this tweet. Back then, my blog post lived at
https://albert-rapp.de/post/2022-05-01-use-grobs-to-get-rounded-corners/Everything after .de/ reflects the directory structure of my old blog. But this Quarto blog has a different structure. Now, this blog post lives at
https://albert-rapp.de/posts/ggplot2-tips/11_rounded_rectangles/11_rounded_rectangles.htmlTherefore, the old link will not work anymore. Thankfully, we can save our old link via redirects. All we have to do is add an alias in the YAML header of the blog post like so
aliases:
  # Move from post's directory to root via ../../../
  # Then add structure from old blog
  - ../../../post/2022-05-01-use-grobs-to-get-rounded-corners/index.html
Hide sections: Using the chunk option code-fold you can hide code in a dropdown menu like this.
library(tidyverse)If you take a look at the resulting HTML-code, you will notice that this is really just a combination of two HTML-tags <details> and <summary>. Thus, folding is not just restricted to code chunks. If you want to e.g. fold an entire section, you can do it manually with HTML.
<details>
<summary> Appendix </summary>

## Appendix
I can fill this with regular Markdown. This is **bold**. This is *italic*.

Also, code chunks work.

```{.r}
library(ggplot2)
mpg |>
  ggplot(aes(hwy, cty)) +
  geom_jitter()
#```
(Remove # and . in {.r}. It's only here for the demo.
Without it, this is a nested code block.
And this does not render well.)
</details>
Appendix
I can fill this with regular Markdown. This is bold. This is italic.
Also, code chunks work.
library(ggplot2)
mpg |>
  ggplot(aes(hwy, cty)) +
  geom_jitter()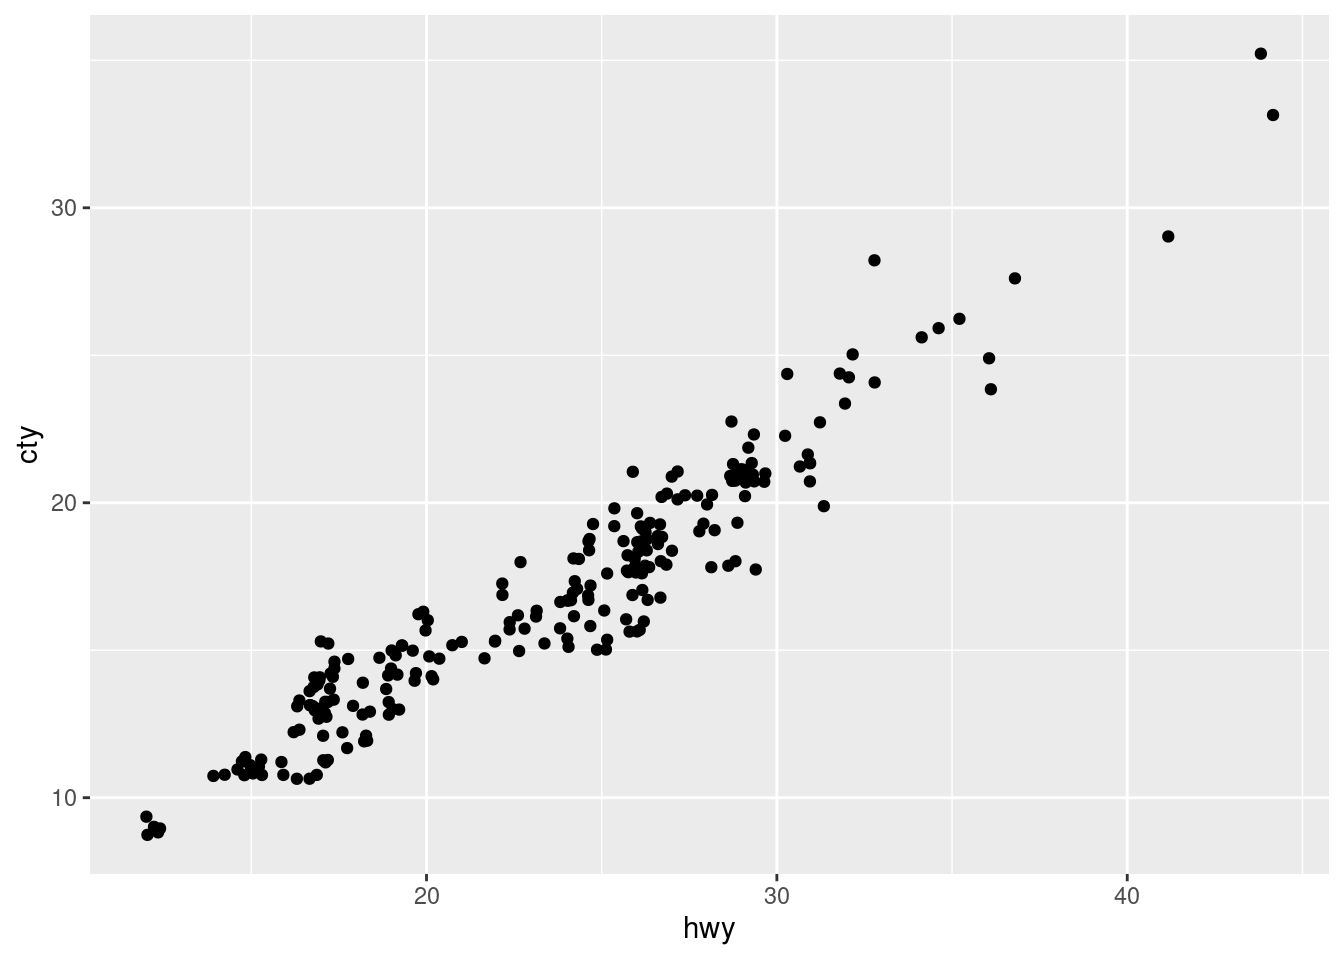
Code execution options in YAML header: I can never remember which execution option (especially wrt. figures) goes where in the YAML header. Thus, I have created a small cheatsheet.
execute:
  message: false
  warning: false
  echo: true
format:
  html:
    fig-height: 5
    fig-dpi: 300
    fig-width: 8.88
    fig-align: center
knitr:
  opts_chunk:
    out.width: 80%
    fig.showtext: TRUE
    collapse: true
comment: "#>"My preferred publisher is Netlify. It’s really easy to set up to publish with them. So, let me describe how that works. Mainly, you have two choices once you have registered with Netlify.
quarto publish netlify and follow the instructions on the terminal.You can use the latter method for publishing at other services as well. For more information, let me refer you to Quarto’s docs. Also, let me mention that Netlify will give you a Netlify URL, e.g. tourmaline-faloodeh-4b36ef.netlify.com. However, I think it’s advisable to buy a custom domain and link it to the Netlify URL (Netlify provides help on that).
I don’t consider my writing particularly good and I am sure that I use a fair share of imperfect grammar. But a small language barrier shouldn’t stop me or you from publishing a blog. And before I leave you, let me share a few pearls of writing wisdom that I found helpful.
Consistency is key: Blogging is like any other any new habit: It takes time until it sticks. That’s why it is really important that you try to post something regularly. If you have trouble overcoming your weaker self I can recommend the book Atomic Habits by James Clear. It contains TONS of great strategies to make a new habit stick.
Perfectionism is the enemy: One major obstacle that can stop you from writing regularly is perfectionism. Don’t worry if your blog post is perfect, or original, or super exciting or whatever. It is maddingly easy to waste hours “polishing” a blog post to perfection. So, if you catch yourself polishing a lot. Then maybe think about just hitting publish.
Expect the indifference: When you publish a blog post, you never know if people will be excited about what you wrote. Chances are that they won’t be. In fact, if you just got started, then count on it! This may sound harsh but it’s actually great. Use this knowledge to counter your need for perfectionism. This can help you to work on your consistency until eventually people care about what you write.
Get feedback on your writing: Nothing makes writing more boring than not getting any feedback. I recommend that you advertise your posts on Rweekly and Twitter. Depending on how people engage with your post (or not), you will have feedback about how much your community cares about the topic you chose. Eventually, you will hit on a topic that people care about. Then, it can be incredibly fun to double down on this topic or engage in conversations about it.
For more tips, you can check out David Perell’s or Dickie Bush’s work. I learned most of the above writing tips from them.
Phew! This is the longest and most in-depth guide that I ever wrote. And this was also the scariest post I ever wrote. When I started on this Quarto endeavor almost two months ago, I had literally ZERO knowledge about
HTML/CSS
Responsive design
Version control with {renv}
and many other small things I’ve learned since then. Thus, I see this guide as a culmination of everything I’ve learned and I am oddly proud about it.
I hope that you enjoyed this guide and that it serves you well. Please reach out to me if you run into any trouble with what I wrote. I am more than happy to improve my guide so that it can help more people.
And don’t forget to stay in touch via my Newsletter, Twitter or my RSS feed. See you next time!
Yes, this is exactly what happened to me. I was young and foolish.↩︎
Here are three other ways I can help you:

Every week, I share bite-sized R tips & tricks. Reading time less than 3 minutes. Delivered straight to your inbox. You can sign up for free weekly tips online.

This in-depth video course teaches you everything you need to know about becoming better & more efficient at cleaning up messy data. This includes Excel & JSON files, text data and working with times & dates. If you want to get better at data cleaning, check out the course page.

This video course teaches you how to leverage {ggplot2} to make charts that communicate effectively without being a design expert. Course information can be found on the course page.
Comment sections
Next, let us add a comment section. This let’s your readers, well, comment on your superb content. My go-to tool for that is utterances. As it works via GitHub, you’ll need to create a separate public repo on GitHub. This repo will be home to your blog’s comments. But first, you need to install utterances on your newly created repo. Follow this link to do so.
Clearly, we want a comment section below every blog post but not below every page (e.g. our landing page). Therefore, a good place to include utterances is in
posts/_metadata.yml. You have already seen the code necessary for that earlier. But for your convenience, here it is again.Beware that the RStudio viewer may not display the comments. Open your blog in an external browser to see if everything worked.